Baked Fried Chicken offers all the comforts of classic Southern cooking without the hassle of deep frying. It has 5 simple ingredients and creates an amazing crispy texture! We love to serve ours with a homemade gravy to make it even more divine.
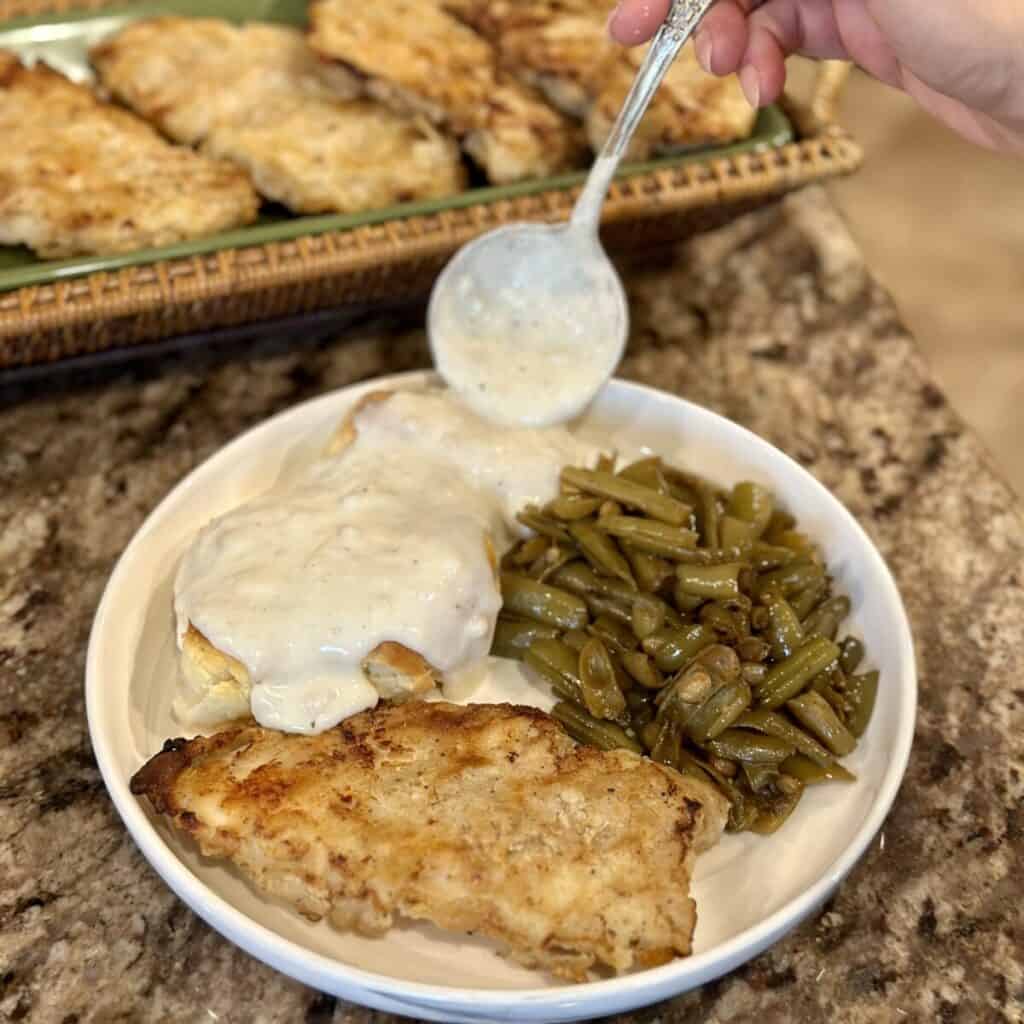
What if I told you there was a way to achieve that crispy perfection without the hassle of deep frying? Enter oven fried chicken—a twist on the beloved Southern classic that promises all the crunch and flavor with none of the fuss. Paired with an easy homemade gravy that's silky smooth and bursting with flavor, this recipe is comfort food at its finest. The whole family will ask for this to be on dinner repeat!
As a Southerner, it's in my blood to make fried chicken and to make it well. But this oven version is so much easier to prepare and healthier too! That's definitely a win especially on a weeknight. The secret ingredient to getting that extra crispy texture even when the chicken is baked is by using Kentucky Kernel Seasoned Flour - I explain more below!
Traditional Southern comfort foods are my favorite! Along with this juicy chicken, you must try my Slow Cooker Red Beans and Rice, Slow Cooker Cube Steak, and American Goulash!
Table of Contents
What is Kentucky Kernel Seasoned Flour
Kentucky Kernel Seasoned Flour is a popular brand of pre-seasoned flour used for coating meats, seafood, and vegetables before frying or baking. It's especially well-known for making Southern-style fried chicken.
It contains a blend of flour, salt, pepper, and various herbs and spices. It's a convenient option to achieve that classic Southern fried chicken taste without the hassle of mixing together your own seasoning blends.
This flour is the key to making your fried chicken at home taste seasoned just like a restaurant. It also keeps the recipe simple, so you don't need to break out a ton of spices from your pantry.
Why You'll Love this Recipe
- Crispy Oven Golden Goodness: Oven fried chicken offers all the satisfying crunch of traditional fried chicken without the excess oil. The seasoned flour coating crisps up beautifully in the oven!
- Tender and Juicy Chicken: Despite being cooked in the oven, the chicken breasts remain tender and juicy.
- Homemade Gravy Goodness: The homemade rich gravy adds an extra layer of flavor to the dish. Drizzle it on top for the ultimate comfort food meal.
- Easy 5 Ingredient Dinner: Despite its impressive presentation and delicious taste, oven fried chicken and white gravy has just a few everyday ingredients and is super easy to make.
Chef Tip: For extra juicy and flavorful chicken, consider brining the for at least 1 hour and up to overnight in the fridge. Place the chicken pieces in salt water or buttermilk in a bowl or ziptop bag. Drain and dry well before dredging and baking.
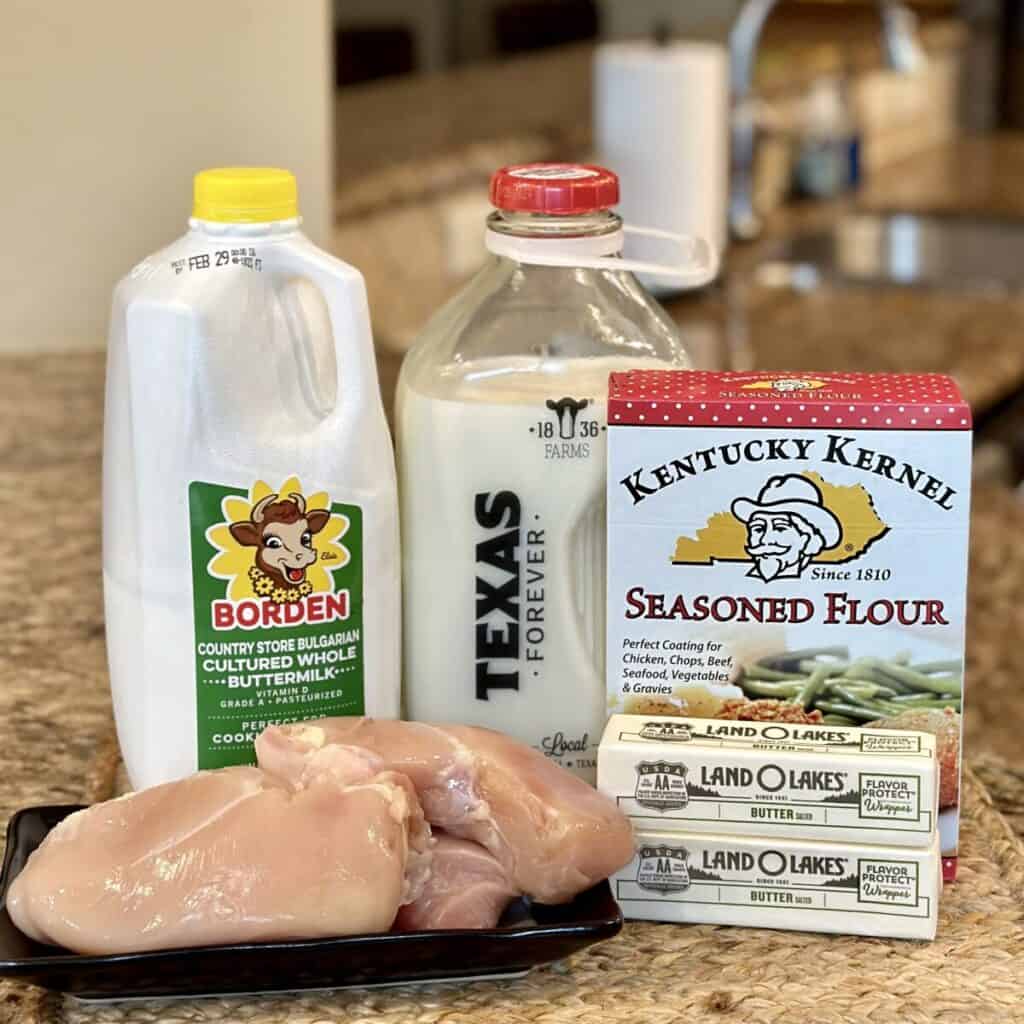
Ingredients You'll Need
Scroll Down for Ingredient Amounts Listed in the Recipe Card Below
- Butter: Helps the chicken achieve a savory, crispy exterior. It also serves at the fat base to make the roux for the gravy.
- Chicken Breasts or Thighs: Cooked to perfect tenderness with maximum flavor and serves as the main protein component of this dish.
- Kentucky Kernel Seasoned Flour: Serves as the coating for the chicken gives it its incredible flavor! It also creates the roux for the gravy.
- Whole Buttermilk: Its acidity helps tenderize the chicken and adds moisture and also helps the seasoned flour adhere to the chicken.
- Whole Milk: It's combined with the roux (butter and seasoned flour mixture) to create a smooth and velvety gravy that complements the oven-fried chicken perfectly.
Tools You'll Need
- 15"x10" Sheet Pan
- 2 Shallow Bowls
- Medium Skillet
- Mix 'N Masher or Silicone Whisk
- Close and Cut (optional)
How to Make Baked Fried Chicken
- If needed, pound chicken breasts with a meat mallet to a 1-inch thickness.
- Pour seasoned flour in 1 shallow dish and buttermilk in another shallow bowl. Remove and set aside ¼ cup of the seasoned flour for the gravy.
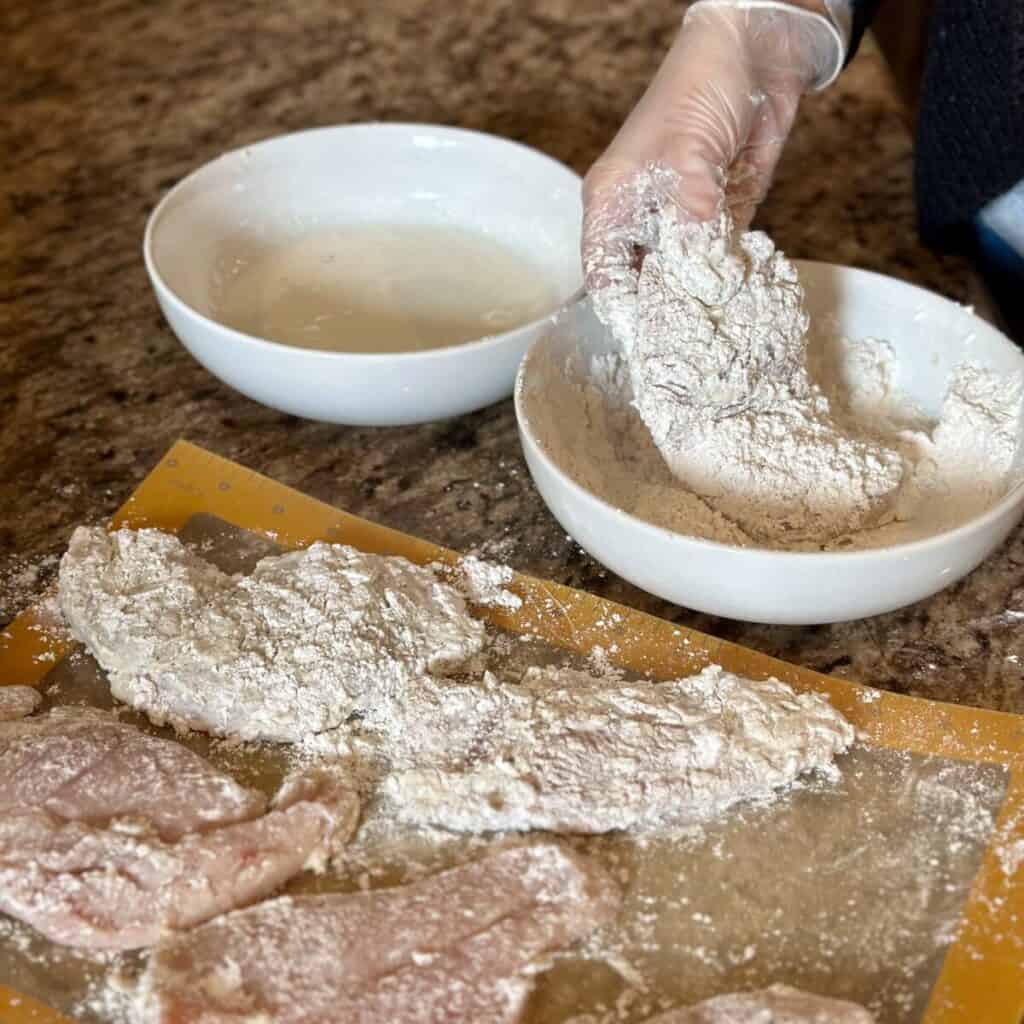
- Lightly coat each cutlet in the seasoned flour and set aside. Once all are coated, working one at a time, submerge the cutlets into the buttermilk then coat and press into the flour. Lightly shake off any excess.
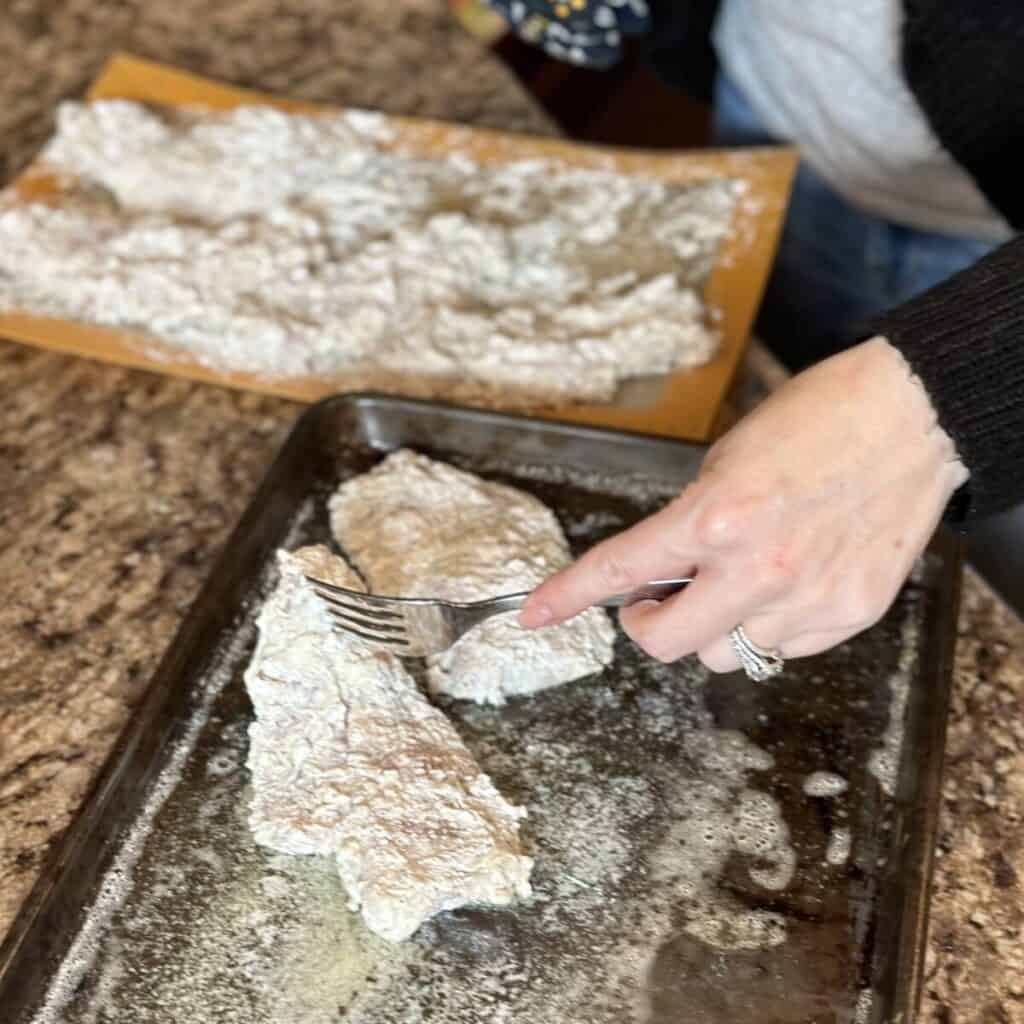
- Place ½ cup of the butter on a 15”x10” sheet pan and place in a preheated 425°F oven (Don’t let it burn). It should melt in 1-2 minutes.
- Place the coated cutlets in the melted butter on the hot pan. Bake for 20 minutes. While it bakes, prepare the gravy.
- Melt the remaining butter in a medium skillet over medium heat. Whisk the reserved seasoned flour into grease and allow to cook for 2-3 minutes.
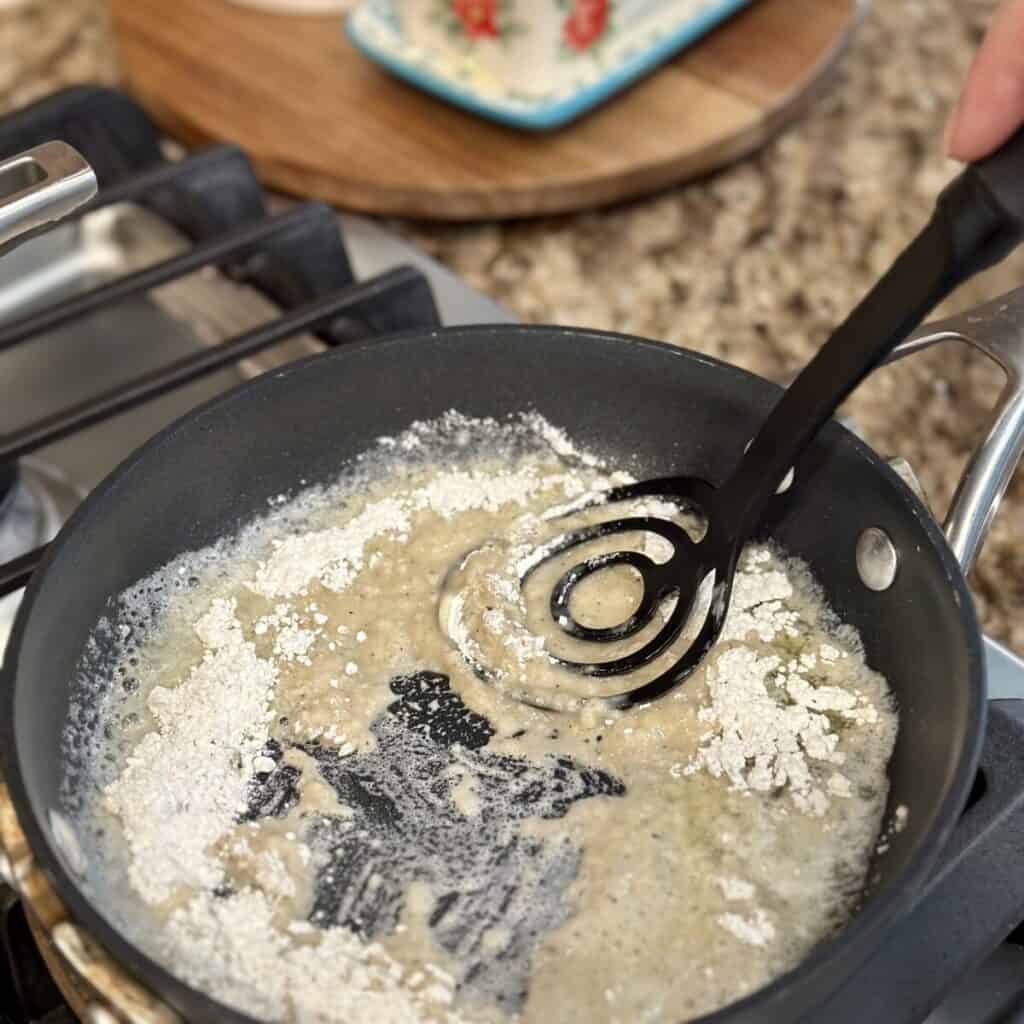
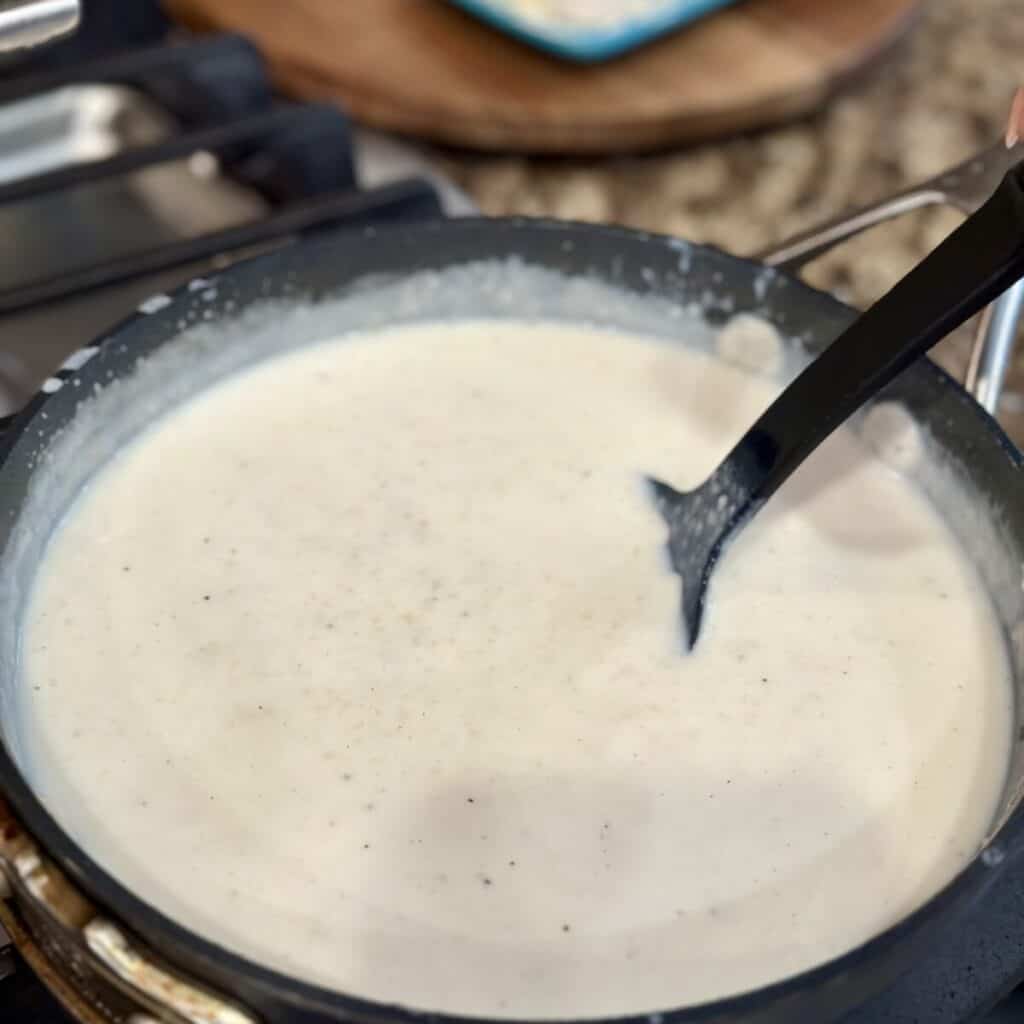
- Add 1 cup milk to the mixture and whisk quickly. This initial mixture will thicken and cook quickly. Once well combined, add an additional cup of milk and stir until well combined. Allow the mixture to come to a light simmer then turn heat to medium-low. As the mixture thickens, add milk to your desired consistency. Season with salt and pepper to taste. Simmer 3-5 minutes.
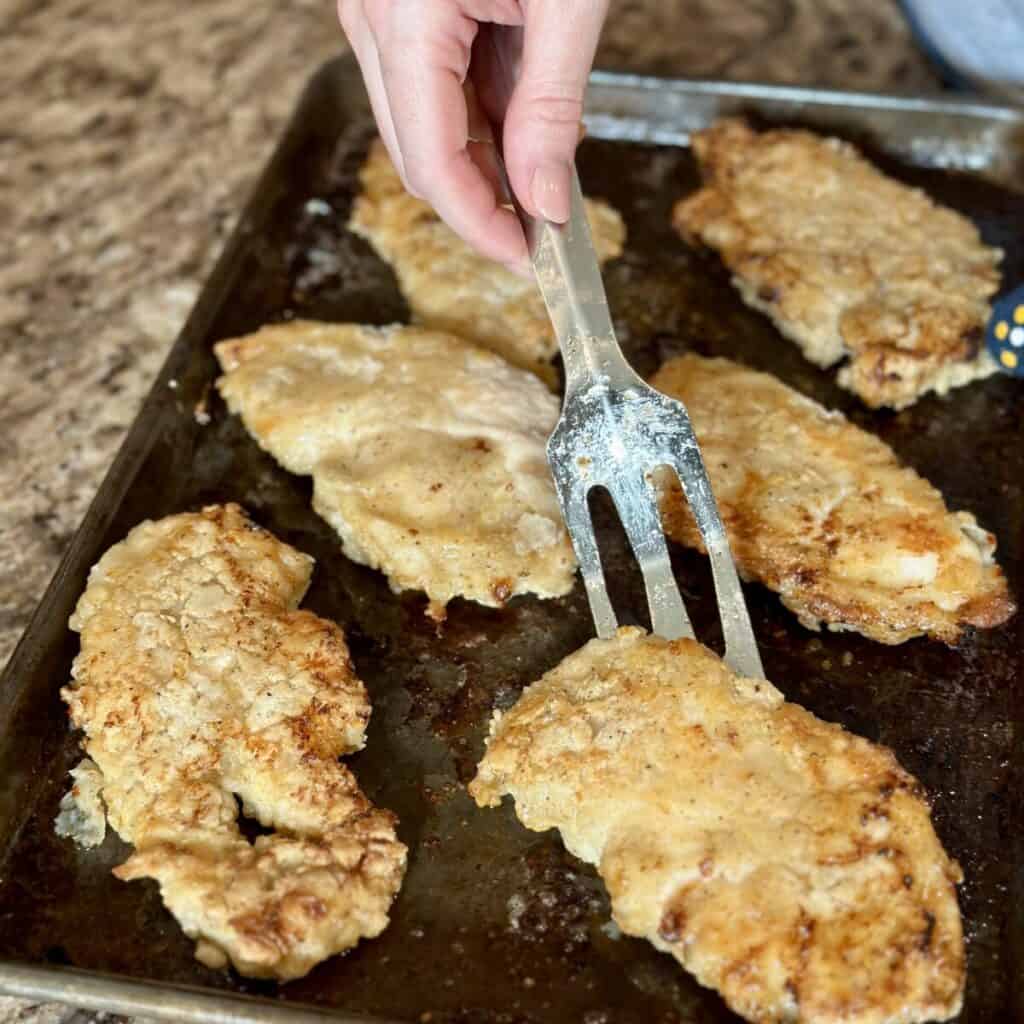
- Once the chicken has completed the initial 20 minutes bake time, use a thin metal flat turner to flip the chicken. Return the pan to the oven. Cook 3-5 minute then broil on high 3-5 minutes more until browned with a meat thermometer reads an internal temperature of 165°F.
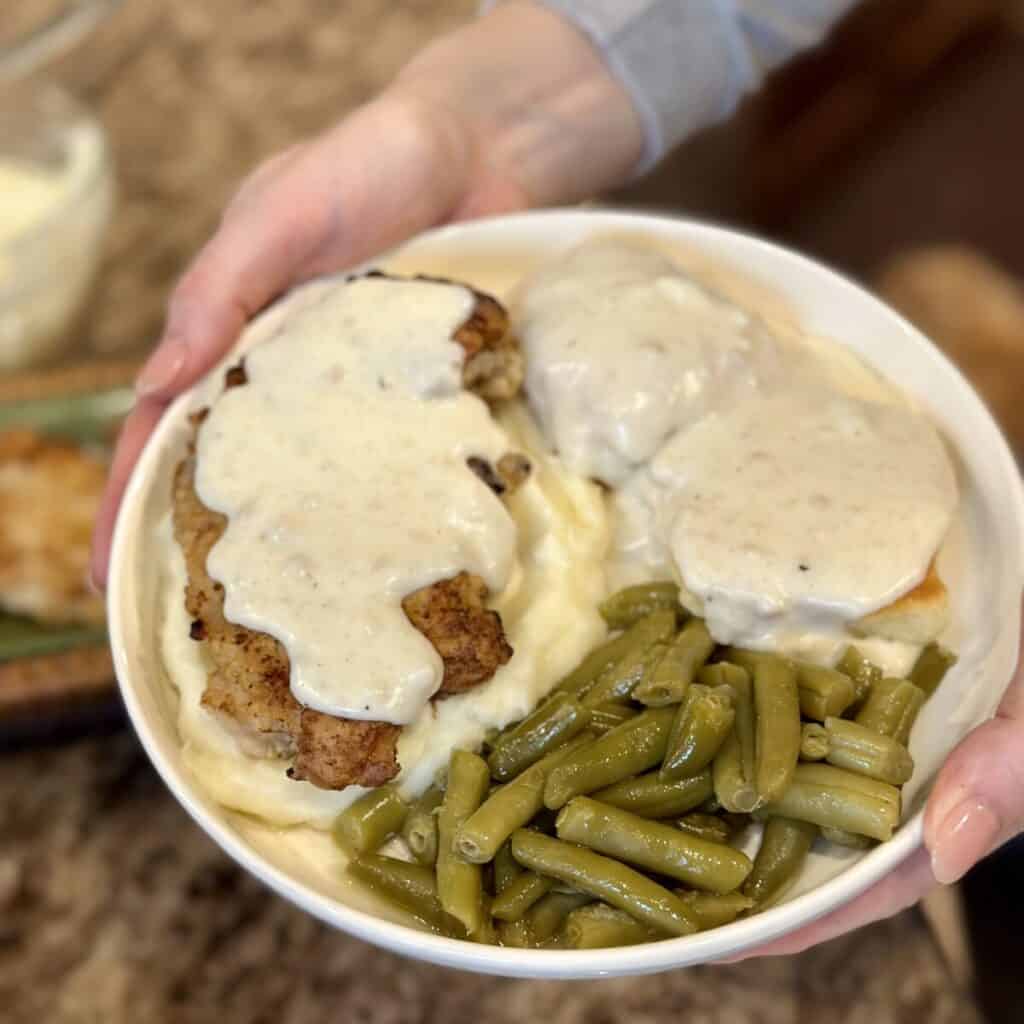
- Serve the chicken with a generous ladle of gravy drizzled over the top or in small bowls for dipping.
Expert Tips and Substitutions
- Flipping Tip: Make sure the chicken pieces are coated well before baking. For successful chicken flipping, use a thin metal spatula. Handle the chicken with care when flipping to avoid scraping off the coating. Use a gentle motion to turn each piece over.
- Chicken and Gravy Seasoning: I do not add salt to the chicken cutlets prior to coating them because the seasoned flour has the sodium level we prefer. I also recommend tasting the gravy prior to adding additional salt and/or black pepper.
- Brine the Chicken: For extra juicy and flavorful chicken, consider brining the chicken pieces in salt water or buttermilk first. Drain and dry before proceeding with the recipe.
- Gravy Recipe Adjustments: If your gravy is too thick, you can thin it out by gradually adding more milk until you reach the desired consistency. If it's too thin, you can thicken it by simmering it for a few more minutes or adding a cornstarch slurry (cornstarch mixed with cold water). Canola or vegetable oil can also be used in place of butter if desired.
- Gluten-Free Option: If you're following a gluten-free diet, you can substitute Kentucky Kernel Seasoned Flour with their gluten-free flour version or your favorite blend of gluten free flour for both the chicken coating and the gravy thickener.
- Dairy-Free Option: For a dairy-free version of the gravy, you can use olive oil or dairy-free margarine instead of butter, and almond milk or coconut milk instead of cow's milk.
- Kentucky Kernel Seasoned Flour Alternatives: If Kentucky Kernel Seasoned Flour is unavailable, you can use another store-bought variety or make it from scratch by combining 2 cups all-purpose flour, 1 teaspoon each salt, black pepper, paprika, garlic powder and onion powder, and ½ teaspoon cayenne pepper (optional).
What to Serve with Oven Fried Chicken Recipe
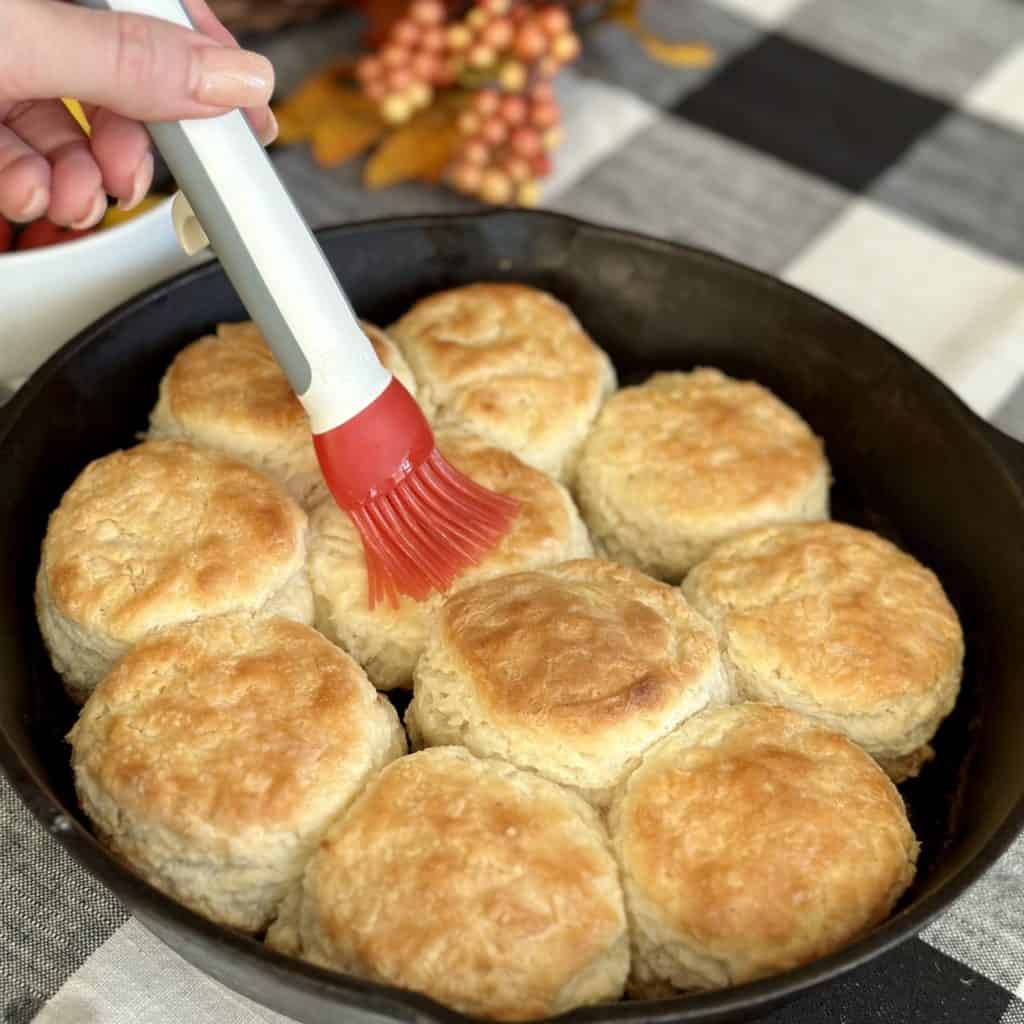
My go-to favorites to serve with this southern comfort food meal is Creamy Mashed Potatoes, homemade Buttermilk Biscuits, and Green Beans. It also pairs perfectly with fresh salad, Ham and Cabbage, Corn Casserole Recipe, and Baked Macaroni and Cheese.
Storage and Freezing
Allow the leftover cooked chicken to cool to room temperature before storing it. Once cooled, store leftovers in an airtight container or wrap it tightly in aluminum foil or plastic wrap. It's best to consume within 3-4 days.
While you can freeze oven fried chicken, it will lose some of its crispiness upon reheating. To freeze, allow the chicken to cool completely, then place it in an airtight container or freezer bag. Reheat in the oven to help maintain crispiness. Gravy will likely separate if frozen and reheated.
Frequently Asked Questions
Yes, you can substitute broth or chicken stock for milk in this country gravy.
Season gravy with salt and pepper to taste, and you can also add additional herbs and spices for flavor, such as thyme, rosemary, or garlic powder. Taste as you go and adjust seasoning as needed.
To prevent lumps in gravy, make sure to whisk the flour into the melted butter thoroughly to create a smooth roux. Gradually add the milk while whisking continuously to ensure the mixture remains smooth.
Yes, you can prepare the seasoned flour-coated chicken ahead of time and refrigerate it until ready to bake. However, it's best to bake the chicken just before serving to maintain its crispiness.
Yes, boneless, skinless chicken breasts, thighs, or tenders can be used for oven fried chicken. However, be mindful of the baking time as different sizes cook faster/slower.
More Easy Delicious Chicken Dinners
- Crockpot Chicken and Stuffing Casserole
- Easy Chicken Parmesan
- Alice Springs Chicken (Outback Copycat)
- Melt In Your Mouth Chicken
Baked Fried Chicken (5 Ingredients!)
Ingredients
- ¾ cup butter divided
- 1-1 ½ pounds boneless, skinless chicken breasts about 3 large breasts, halved
- 10 ounce box Kentucky Kernel Seasoned Flour
- 1 cup full-fat buttermilk
- 2-2 ½ cups milk
Instructions
- If needed, pound chicken breasts to a 1-inch thickness.
- Pour seasoned flour in 1 shallow bowl and buttermilk in another shallow bowl. Remove and set aside ¼ cup of the seasoned flour for the gravy.
- Lightly coat each cutlet in the seasoned flour and set aside. Once all are coated, working one at a time, submerge the cutlets into the buttermilk then coat and press into the flour. Lightly shake off any excess.
- Place ½ cup of the butter on a 15”x10” sheet pan and place in a preheated 425°F oven (Don’t let it burn). It should melt in 1-2 minutes.
- Place the coated cutlets in the melted butter on the sheet pan. Bake for 20 minutes. While it bakes, prepare the gravy.
- Melt the remaining butter in a medium skillet over medium heat. Whisk the reserved seasoned flour into grease and allow to cook for 2-3 minutes.
- Add 1 cup milk to the mixture and whisk quickly. This initial mixture will thicken and cook quickly. Once well combined, add an additional cup of milk and stir until well combined. Allow the mixture to come to a light simmer then turn heat to medium-low. As the mixture thickens, add milk to your desired consistency. Season with salt and pepper to taste. Simmer 3-5 minutes.
- Once the chicken has completed the initial 20 minutes bake time, use a thin metal flat turner to flip the chicken. Return the pan to the oven. Cook 3-5 minute then broil on high 3-5 minutes more until browned with an internal temperature of 165°F.
- Serve the chicken with a generous ladle of gravy drizzled over the top or in small bowls for dipping.
Video
Notes
-
- Flipping Tip: Make sure the chicken pieces are coated well before baking. For successful chicken flipping, use a thin metal spatula. Handle the chicken with care when flipping to avoid scraping off the coating. Use a gentle motion to turn each piece over.
-
- Chicken and Gravy Seasoning: I do not add salt to the chicken cutlets prior to coating them because the seasoned flour has the sodium level we prefer. I also recommend tasting the gravy prior to adding additional salt and/or black pepper.
-
- Brine the Chicken: For extra juicy and flavorful chicken, consider brining the chicken pieces in salt water or buttermilk first. Drain and dry before proceeding with the recipe.
-
- Gravy Recipe Adjustments: If your gravy is too thick, you can thin it out by gradually adding more milk until you reach the desired consistency. If it's too thin, you can thicken it by simmering it for a few more minutes or adding a cornstarch slurry (cornstarch mixed with cold water). Canola or vegetable oil can also be used in place of butter if desired.
-
- Gluten-Free Option: If you're following a gluten-free diet, you can substitute Kentucky Kernel Seasoned Flour with their gluten-free flour version or your favorite blend of gluten free flour for both the chicken coating and the gravy thickener.
-
- Dairy-Free Option: For a dairy-free version of the gravy, you can use olive oil or dairy-free margarine instead of butter, and almond milk or coconut milk instead of cow's milk.
-
- Kentucky Kernel Seasoned Flour Alternatives: If Kentucky Kernel Seasoned Flour is unavailable, you can use another store-bought variety or make it from scratch by combining 2 cups all-purpose flour, 1 teaspoon each salt, black pepper, paprika, garlic powder and onion powder, and ½ teaspoon cayenne pepper (optional).




Ashley Kargoll
Do not use glass pan. Breading stuck to glass and turned out like mush.
Laura Ashley
I’m so sorry it stuck like that for you!
Laura Ashley
This chicken is so easy to make and one of the best feel good meals!
Kathleen
I've never seen that flour before here in the West, so thank you for giving me directions on how to make my own seasoned flour! Made it for our family last night -- gobbled up!!!! And it is way easier than deep frying!
Laura Ashley
That's wonderful! I'm so happy you liked it so much!!
Jules
Oh my gosh, my guilty pleasure was on overtime when I loaded up my plate with fried chicken and delicious potatoes with gravy! I'm going to be guilty on a regular basis I'm sure.
Laura Ashley
YAY!! I'm so happy it was such a big hit!!
mandy
Such a delicious dinner. The whole family loved it. Lots of rave reviews!
Laura Ashley
Thank you so much!!