Cheese Dreams
These quick and easy Cheese Dreams are ultra rich and buttery, and packed with melty, crispy cheese for the ultimate crowd-pleasing party appetizer. With only 7 ingredients, I guarantee these will disappear before your eyes in seconds.

With a name like Cheese Dreams, this extra cheesy snack is what dreams are made of! A nostalgic Southern-style appetizer made with extra buttery bread and melted cheese, these Cheese Dreams are perfectly crispy on the outside, and cheesy and gooey on the inside. They’re easy to make ahead with simple pantry ingredients, so they’re perfect for holiday gatherings, cocktail parties, weekend brunch, or game day.
Table of Contents
Save The Recipe!
Add your email below and we’ll send it straight to your inbox+ you’ll receive all our newest recipes!
With soft, tender white bread smeared with a luxurious cheese spread then baked to golden buttery perfection, these Cheese Dreams are next level delicious. We love how easy they are to customize with different cheeses and toppings, too. Always the first to go, Cheese Dreams are a crowd-pleasing appetizer everyone loves. You’ll believe it when you see them disappear, too!
If you like cheesy appetizers like this, be sure to try these easy Boursin Stuffed Mushrooms and these flavor-packed Bacon Crackers that are always a hit.
Why You’ll Love This Recipe
- Quick and easy to prepare. With a super simple, straightforward method and short bake time, these come together quickly with ease. Anyone can make them stress-free.
- Made with minimal ingredients. This recipe calls for just a handful of ingredients, 7 to be exact. Most are pantry and fridge staples you probably have.
- Perfect make-ahead party appetizer. Easy to make, packed with cheesy flavor and always a crowd-pleaser, these are ideal for entertaining.
- Kid-friendly and adult-approved. An easy, tasty riff on a grilled cheese, these bite sized cheese delights are craved by all.
what are cheese dreams?
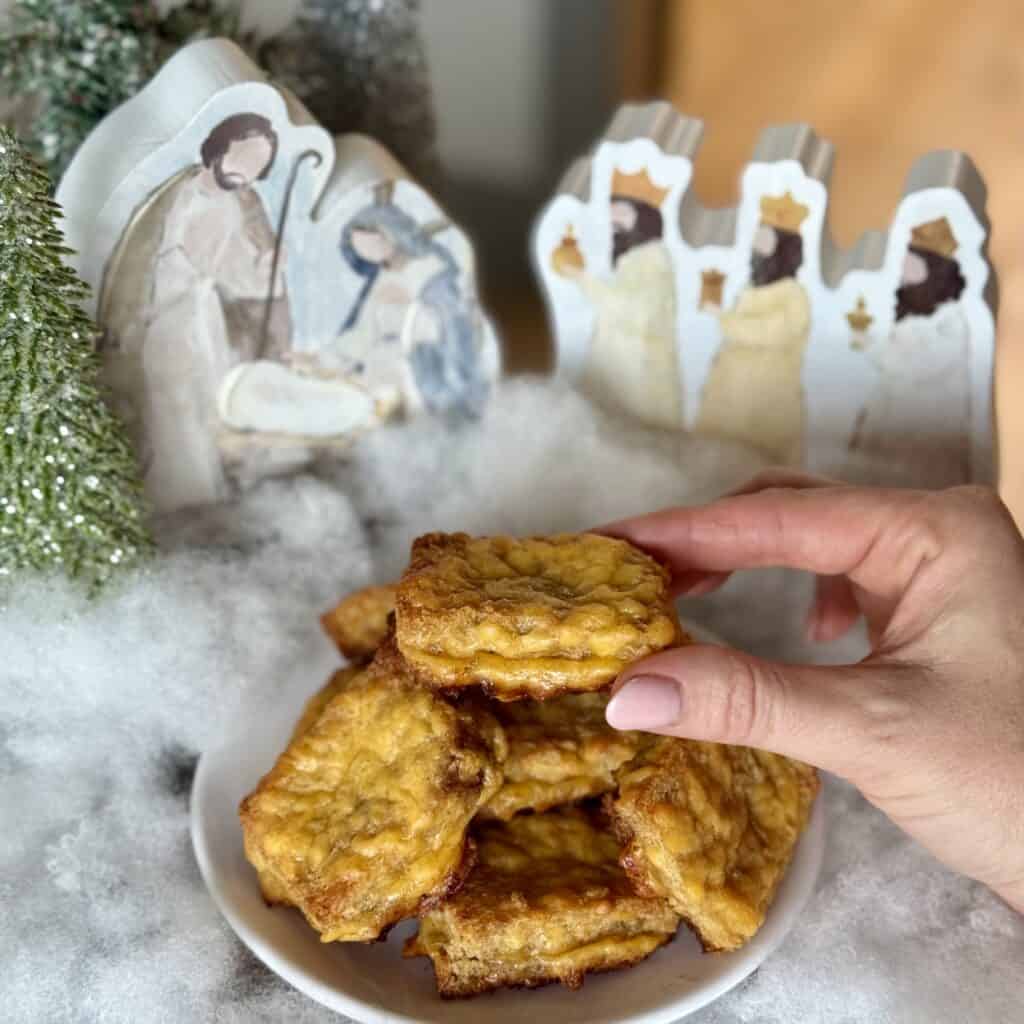
Cheese Dreams are a retro, bite-sized baked cheesy appetizer that’s a delicious variation of a crustless grilled cheese. These tasty finger sandwiches are traditionally made with white bread and a mixture of softened butter, shredded cheese and spices. They’re the perfect cross between a cheese straw and a grilled cheese, baked to golden perfection.
Ingredients
Scroll Down for Ingredient Amounts Listed in the Recipe Card Below
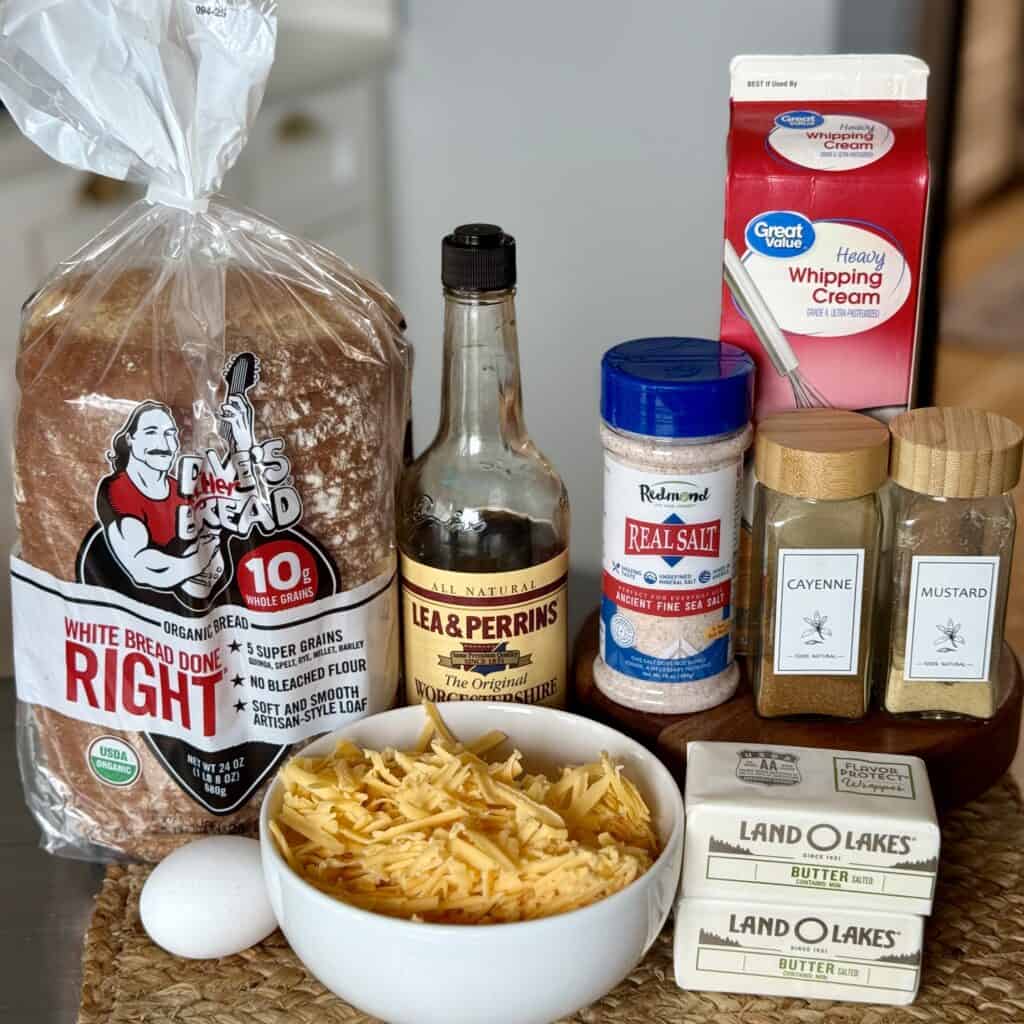
- Butter: For golden brown richness. Use unsalted, since the cheese can be pretty salty as is.
- Sharp Cheddar Cheese: Sharp and nutty, grate your own for the best melt.
- Heavy Cream: Brings an extra richness and indulgence to the cheese spread.
- Egg: To bind the spread together.
- Worcestershire Sauce: Adds a savory, umami flavor.
- Salt: Just a sprinkle, to season.
- Dry Mustard & Cayenne Pepper: Subtly sharp, hot and spicy, to add depth of flavor.
- White Sandwich Bread: Perfectly soft and tender. There’s nothing quite like it, so use the real thing.
Tools You’ll Need
- Half Size or 12″x17″ Sheet Pan
- Measuring Cups and Spoons
- Mixing Bowls
- Parchment Paper
how to make cheese dreams
- Preheat oven to 350°F. Line a baking sheet with parchment paper.
- In a large bowl, beat the softened butter until smooth.
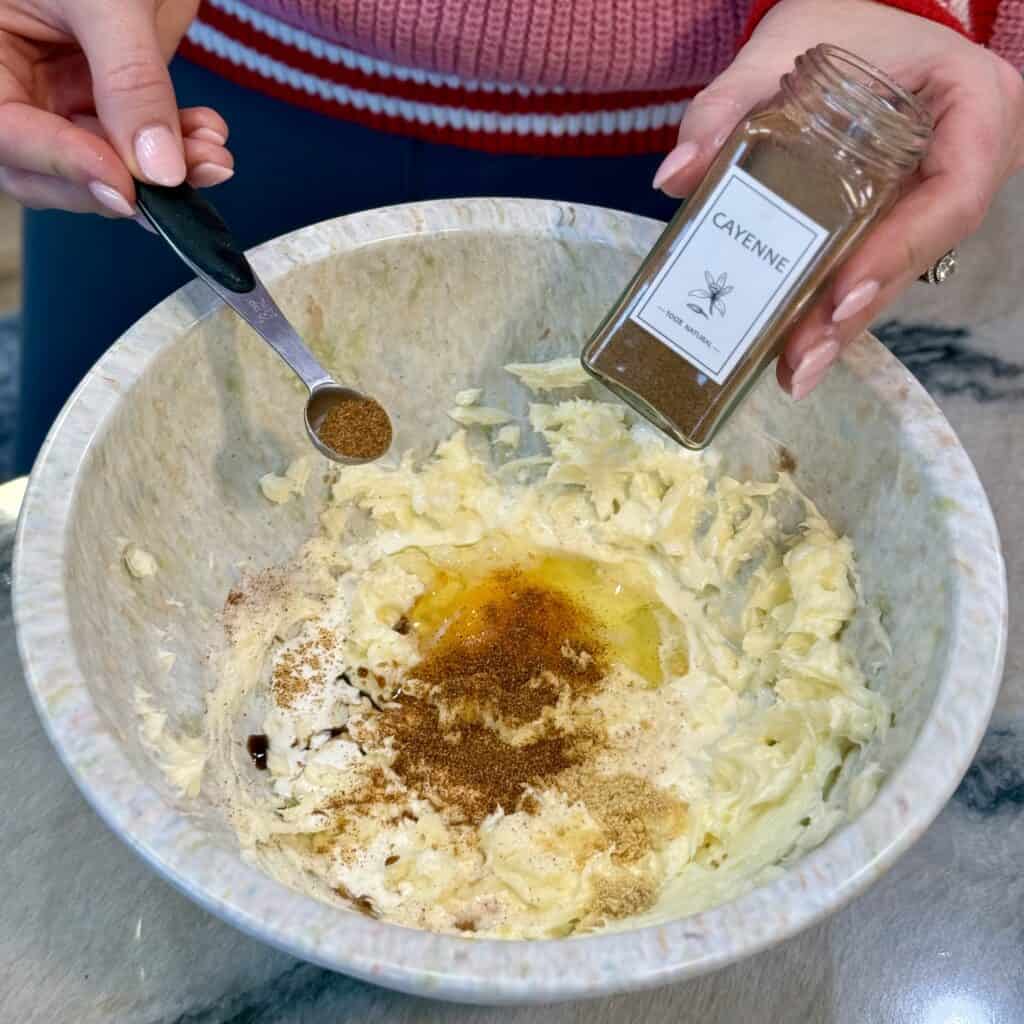
- Add the cheddar cheese, heavy cream, egg, Worcestershire sauce, salt, dry mustard, and cayenne. Mix until fully combined and creamy.
- Lay bread slices on a work surface. Remove the edges and discard or save for another recipe. Quarter each slice. Spread 1/3 of the cheese mixture evenly over half of the quartered pieces, going all the way to the edges.
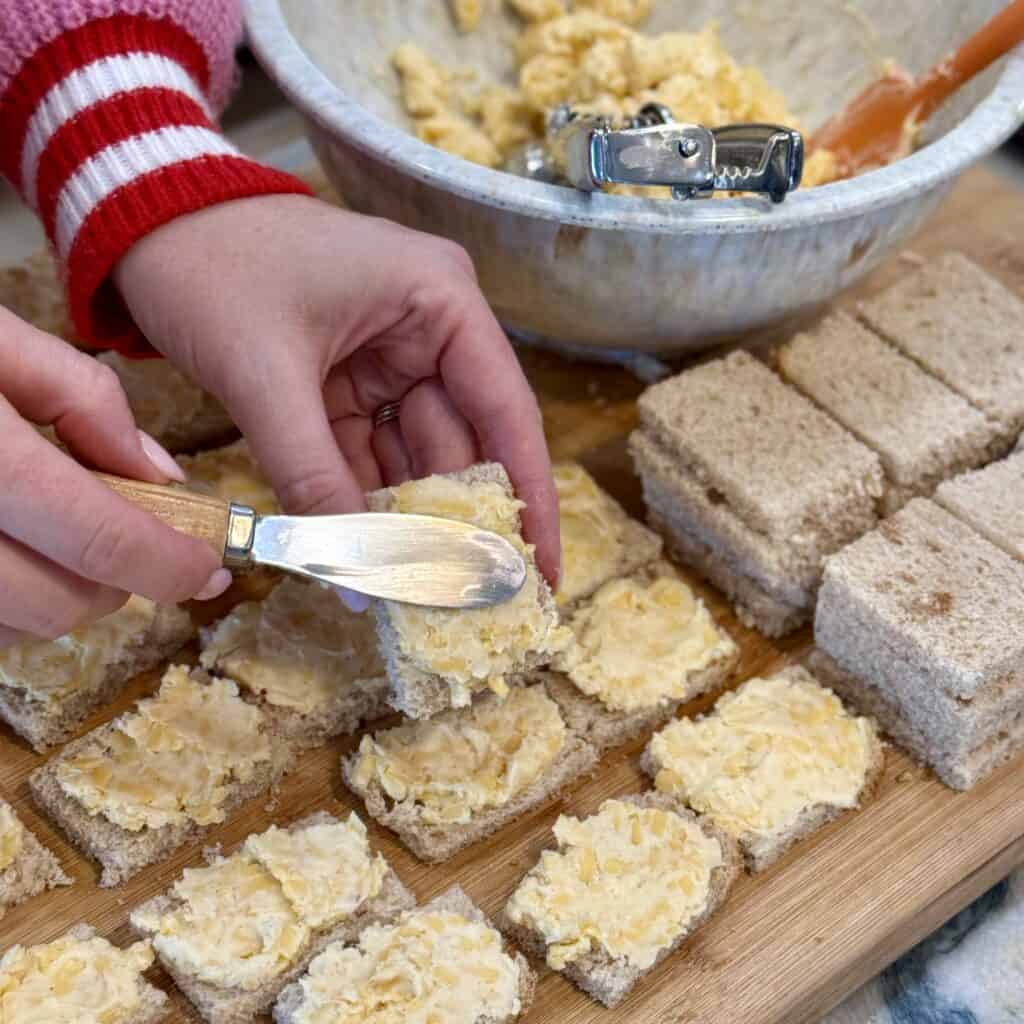
- Place pieces cheese-side up on the prepared baking sheet, leaving a little space between each. Top with the remaining quartered bread slices.
- Spread the remaining cheese mixture on the tops and sides of each square.
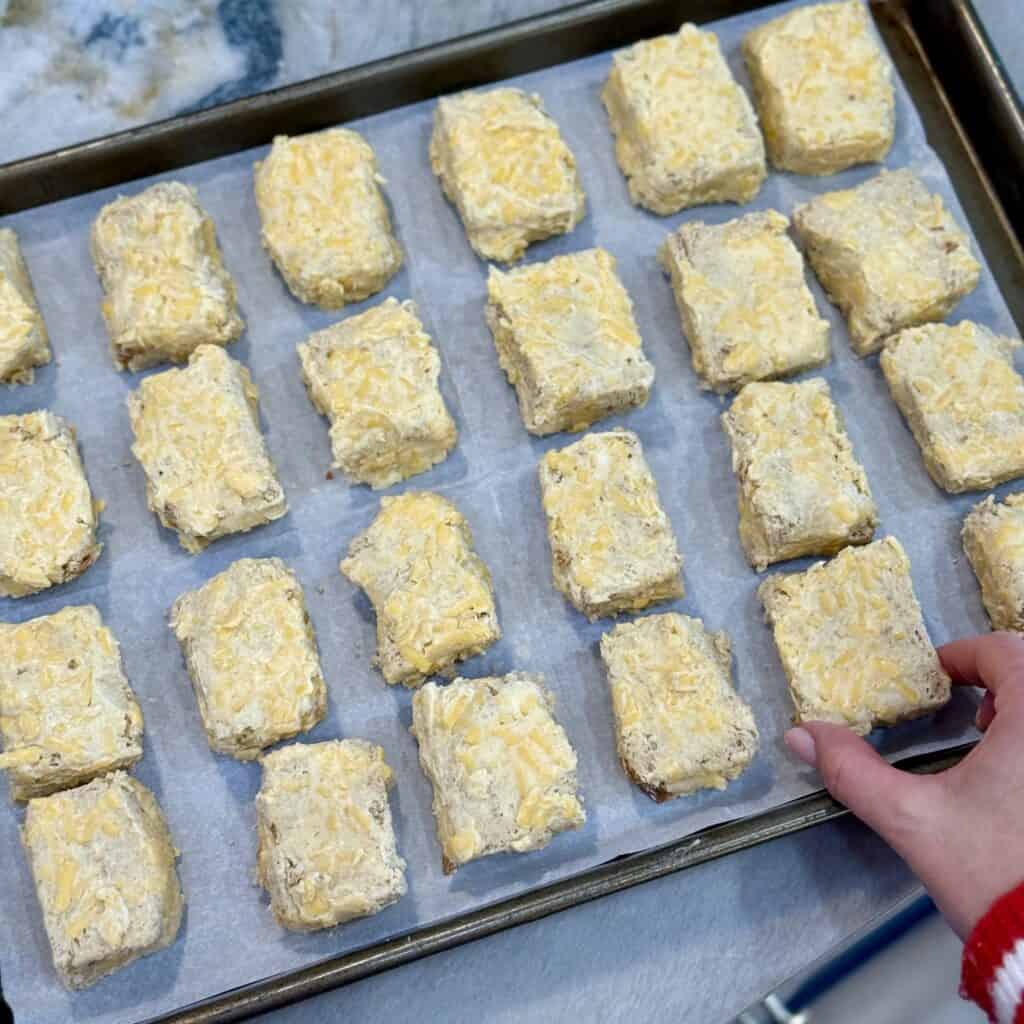
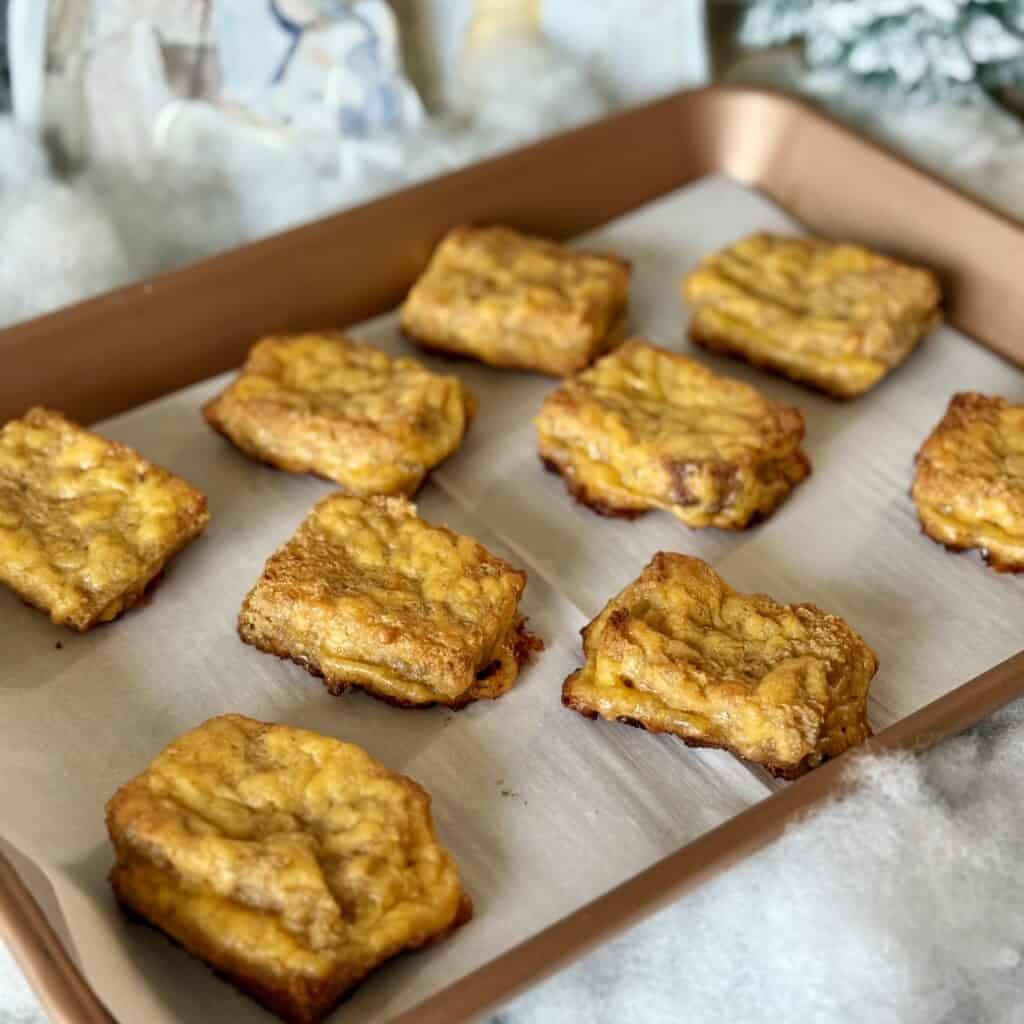
- Bake for 15-20 minutes, until the cheese topping is bubbly, edges are lightly golden, and the bottoms are crisp.
- Let cool for 2–3 minutes before transferring to a serving platter.
Expert Tips
- Use freshly shredded cheese. Grate your own for the best melt. The pre-shredded packaged cheese can have a coating that prevents it from melting well, and it can have a grainy texture.
- Don’t overbake. Avoid baking these for too long or the bread can become too crunchy. Cook them just until everything is melty, golden, and the tops and edges are starting to crisp up.
- Serve immediately. These are best enjoyed straight from the oven while they’re warm and gooey.
- Use a sheet pan for easy entertaining. Assemble and bake a big batch on a parchment lined sheet pan. You can fit a bunch on there. Then serve straight from the pan once it cools. No need to dirty another platter!
- Add a sprinkle of paprika. A little goes a long way for a pop of added color and flavor. Try adding a dash of garlic powder or onion powder for even more flavor, or Old Bay or ranch seasoning for a zesty twist. You could even add fresh herbs like chives into the cheese spread.
Variations
Some easy flavor variations we’ve made in the past:
- Bacon cheese dreams. Stir in finely chopped bacon into the cheese mixture for a smokey, crunchy flavor and texture.
- Spicy jalapeño version. Add diced fresh or pickled jalapeños for a kick and extra heat.
- Pimento cheese variation. Use your favorite homemade or store bought pimento cheese, and spread that onto the bread for a pimento cheese twist.
- Gruyère and caramelized onion version: Instead of sharp cheddar, swap in nutty, melty Gruyere with sweet, jammy caramelized onions for a delicious flavor combination.
- Mini party-sized bites: Cut bread into sixths, or mini triangles, for small bite-sized versions. They’re perfectly poppable for entertaining!
What To Serve With Cheese Dreams
Cheese Dreams are the perfect appetizer and great addition to a party or holiday spread. Here are some of our favorites to serve them with:
- Bacon Wrapped Dates
- Boursin Stuffed Mushrooms
- Barbecue Meatballs with Grape Jelly
- Crockpot Brown Sugar Pineapple Ham
- Turkey Tenderloin
- Rosemary Garlic Chicken
Storage
Store leftover cheese dreams in an airtight container in the fridge for up to 3 days. To reheat, warm them in the oven at 350° until melty and hot.
We don’t recommend freezing leftovers, as the texture can change and turn mushy.
Cheese Dreams are great to prep ahead. Assemble them in advance and store in the fridge on a baking sheet, or in an airtight container. Bake them straight from the fridge according to the recipe instructions and serve.
Frequently Asked Questions
We like the flavor and melt of sharp cheddar, but any cheese that melts well would work. Gouda, havarti, provolone or Monterey jack are all great options.
Once baked, transfer them to a wire rack to prevent the bottoms from getting soggy, and be sure to bake them at 350° so they crisp up nicely. A lower temperature won’t get them golden.
Definitely! The air fryer will get them crispy on the outside and gooey on the inside. Air fry at 350° for 4-6 minutes, until golden and melty.
We really recommend white sandwich bread for it’s soft tender texture.
More Cheesy Appetizer Recipes
Cheese Dreams
Ingredients
- 1 cup unsalted butter softened
- 2 cups finely grated sharp cheddar cheese
- 2 tablespoons heavy cream
- 1 large egg
- 1 teaspoon Worcestershire sauce
- 1/2 teaspoon salt
- 1/2 teaspoon dry mustard
- 1/4 teaspoon cayenne pepper
- 16 ounce package white sandwich bread slices
Instructions
- Preheat oven to 350°F. Line a baking sheet with parchment paper.
- In a large bowl, beat the softened butter until smooth.
- Add the cheddar cheese, heavy cream, egg, Worcestershire sauce, salt, dry mustard, and cayenne. Mix until fully combined and creamy.
- Lay bread slices on a work surface. Remove the edges and discard or save for another recipe. Quarter each slice. Spread 1/3 of the cheese mixture evenly over half of the quartered pieces, going all the way to the edges.
- Place pieces cheese-side up on the prepared baking sheet, leaving a little space between each. Top with the remaining quartered bread slices.
- Spread the remaining cheese mixture on the tops and sides of each square.
- Bake for 15-20 minutes, until the cheese topping is bubbly, edges are lightly golden, and the bottoms are crisp.
- Let cool for 2–3 minutes before transferring to a serving platter.
Notes
- Store leftovers in an airtight container in the fridge for up to 3 days. To reheat, warm in the oven at 350° until melty and hot.
- We don’t recommend freezing leftovers, as the texture can change and turn mushy.
- Prep these ahead of time — assemble in advance and store in the fridge on a baking sheet or in an airtight container. Bake straight from the fridge according to the recipe instructions and serve.
Tips
- Use freshly shredded cheese. Grate your own for the best melt. The pre-shredded packaged cheese can have a coating that prevents it from melting well, and it can have a grainy texture.
- Don’t overbake. Avoid baking these for too long or the bread can become too crunchy. Cook them just until everything is melty, golden, and the tops and edges are starting to crisp up.
- Serve immediately. These are best enjoyed straight from the oven while they’re warm and gooey.
- Use a sheet pan for easy entertaining. Assemble and bake a big batch on a parchment lined sheet pan. You can fit a bunch on there. Then serve straight from the pan once it cools. No need to dirty another platter!
- Add a sprinkle of paprika. A little goes a long way for a pop of added color and flavor. Try adding a dash of garlic powder or onion powder for even more flavor, or Old Bay or ranch seasoning for a zesty twist. You could even add fresh herbs like chives into the cheese spread.
Nutrition

About Laura
Taught by some of the best, cooking and entertaining has always been my favorite hobby. Food is my love language! The conception of Dinner in 321 came from my family talks that sharing our dinners would help others learn new skills, tasty recipes, and make cooking fun! Read more…