Basic Burgers and Potato Wedges
It might be basic on the surface, but the flavors and satisfaction of perfectly executed basic burgers and potato wedges is anything but BASIC. It’s delicious a family dinner WIN!

A perfectly seasoned and seared burger, covered with cheese and your favorite toppings is sometimes exactly what nourishes the body and soul! Burgers are one of those meals that’s super individual. The seasonings used and toppings vary from person to person, but executing the perfect cook is what can bring us together!
Save The Recipe!
Add your email below and we’ll send it straight to your inbox+ you’ll receive all our newest recipes!
Overcooked, undercooked, under-seasoned and sizing inconsistencies is where cooking burgers can go wrong. Some folks like to eyeball cooking precision and with some dishes I do as well, but burgers are definitely one that I measure to ensure burger perfection.
Table of Contents
Tips for Perfect Basic Burgers and Potato Wedges
First, I use a scale to measure the ground beef. Having different size patties will likely cause some burgers to be done more or less than you’d like.
Second, I set a timer for my burger flips. It’s so easy to walk away from the skillet, get distracted and forget to flip your patties. This will ensure even cooking.
Third, I check the internal temperature with a meat thermometer to ensure it’s perfectly done. No dry, overcooked or raw burgers over here!
For an alternative potato cooking method, these delicious Air Fryer Potato Wedges are an excellent option! Crunchiness is guaranteed! They’re crispy on the outside and soft on the inside.
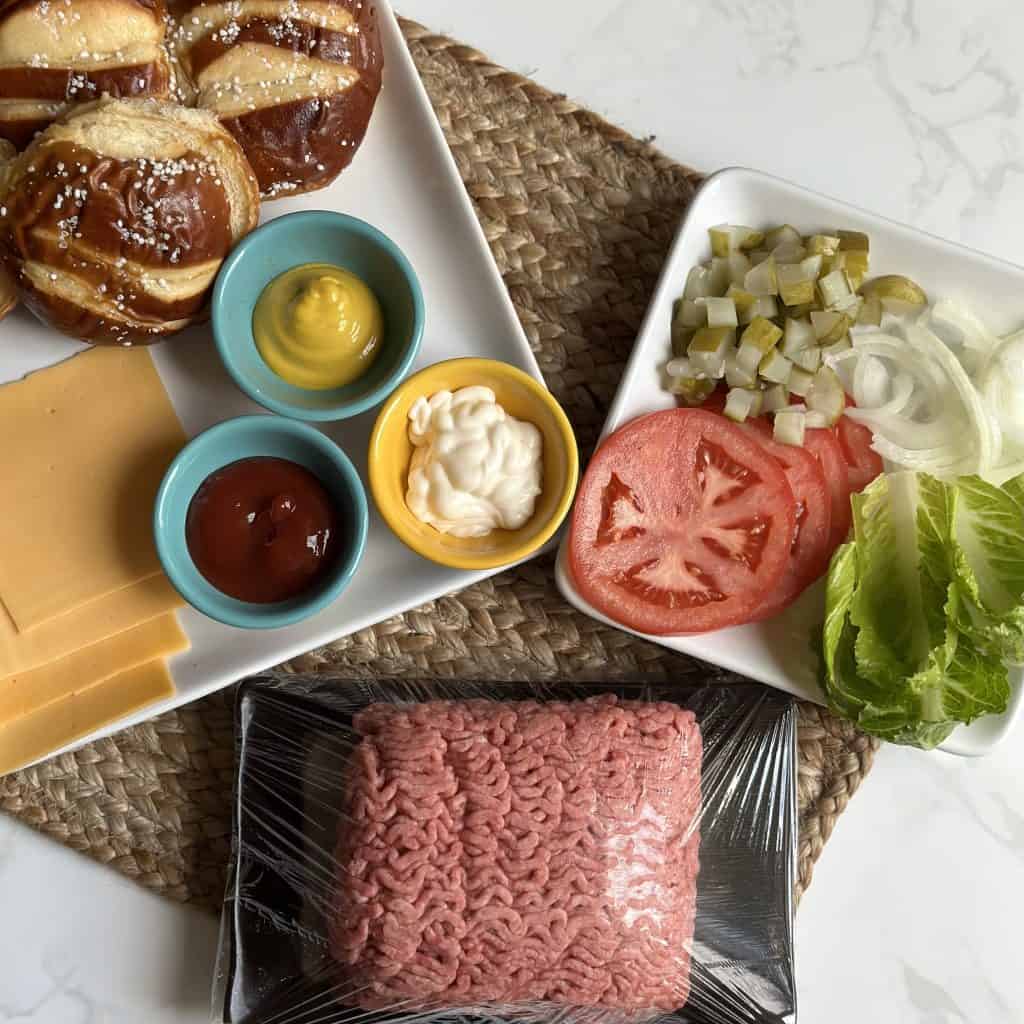
What You’ll Need
- For the Potato Wedges
- Russet Potatoes
- Olive Oil
- Seasoning Salt

- For the Burgers
- Ground Beef
- Butter
- Hamburger Buns
- Desired Burger Toppings
Tools You’ll Need
- Large Skillet or Stove/Oven Safe Roaster Pan
- Griddle Pan (optional)
- Mallet/Tenderizer (optional)
- Large Sheet Pan
How to Make this Recipe
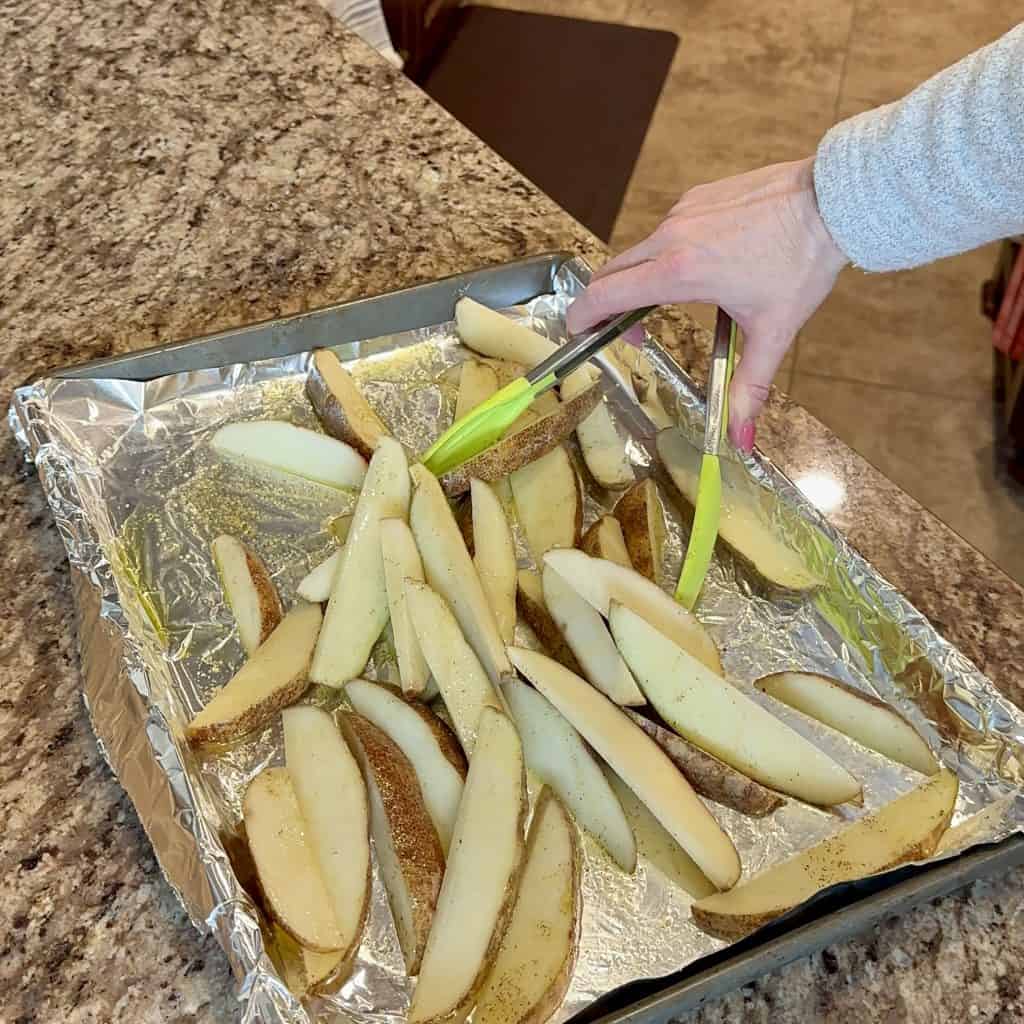
- While the oven preheats to 450°F, toss the prepared potato wedges with olive oil and seasonings on an aluminum foil-lined sheet pan. Spread them in an even layer for the perfect cook.
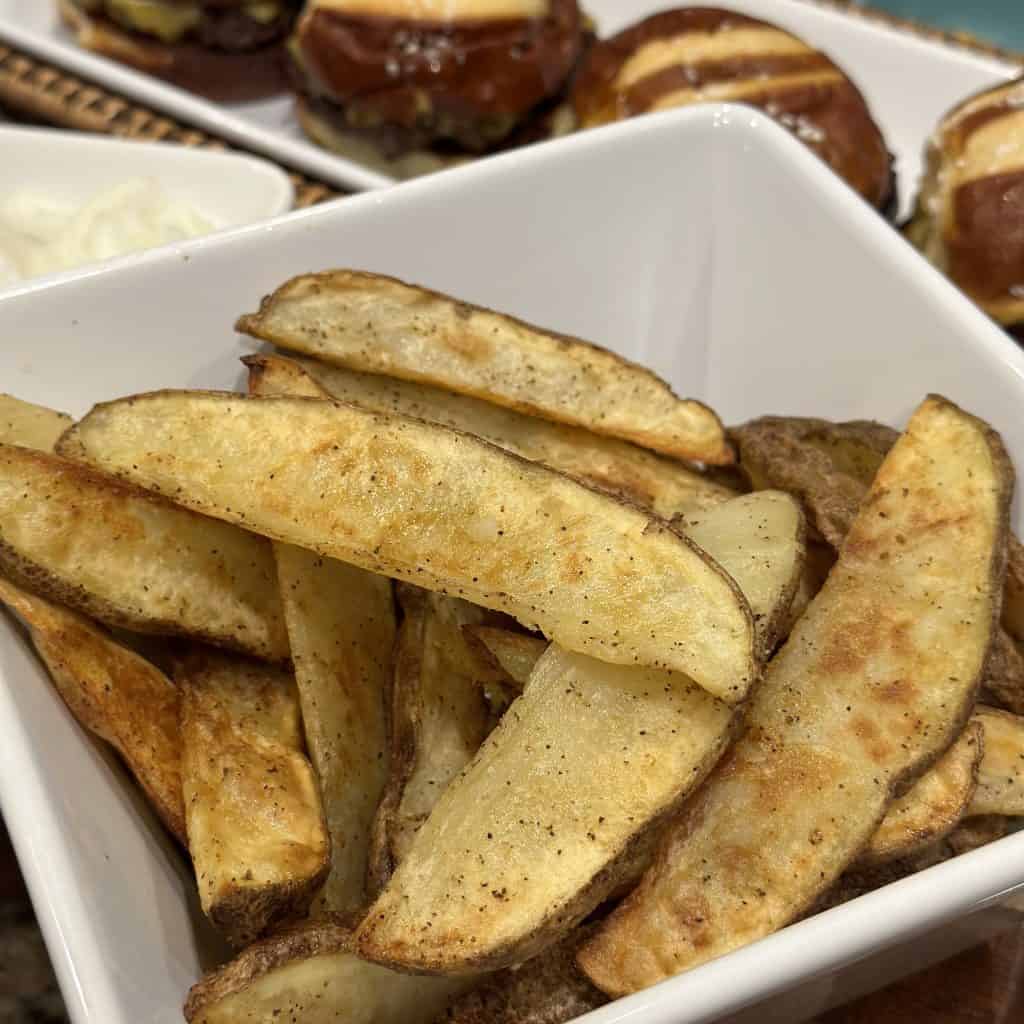
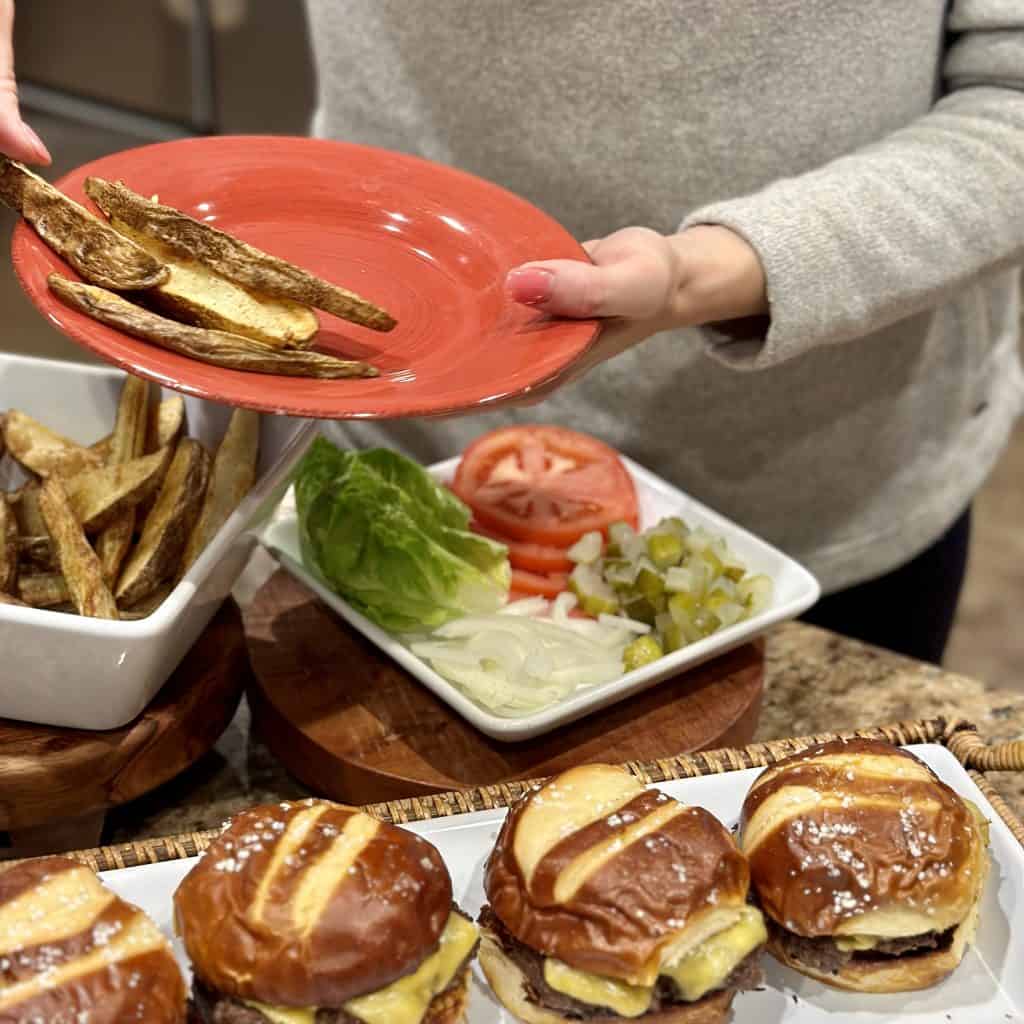
- Roast in the oven for 20-25. Flip the wedges and bake an additional 10-15 minutes or until they’re slightly charred and golden brown. Transfer to a serving dish. Optional, sprinkle with additional seasoning salt.
- While the potatoes are roasting make the burgers. Divide and measure the ground beef into even 6 ounce size balls or to your desired size. Season one side with salt and pepper.
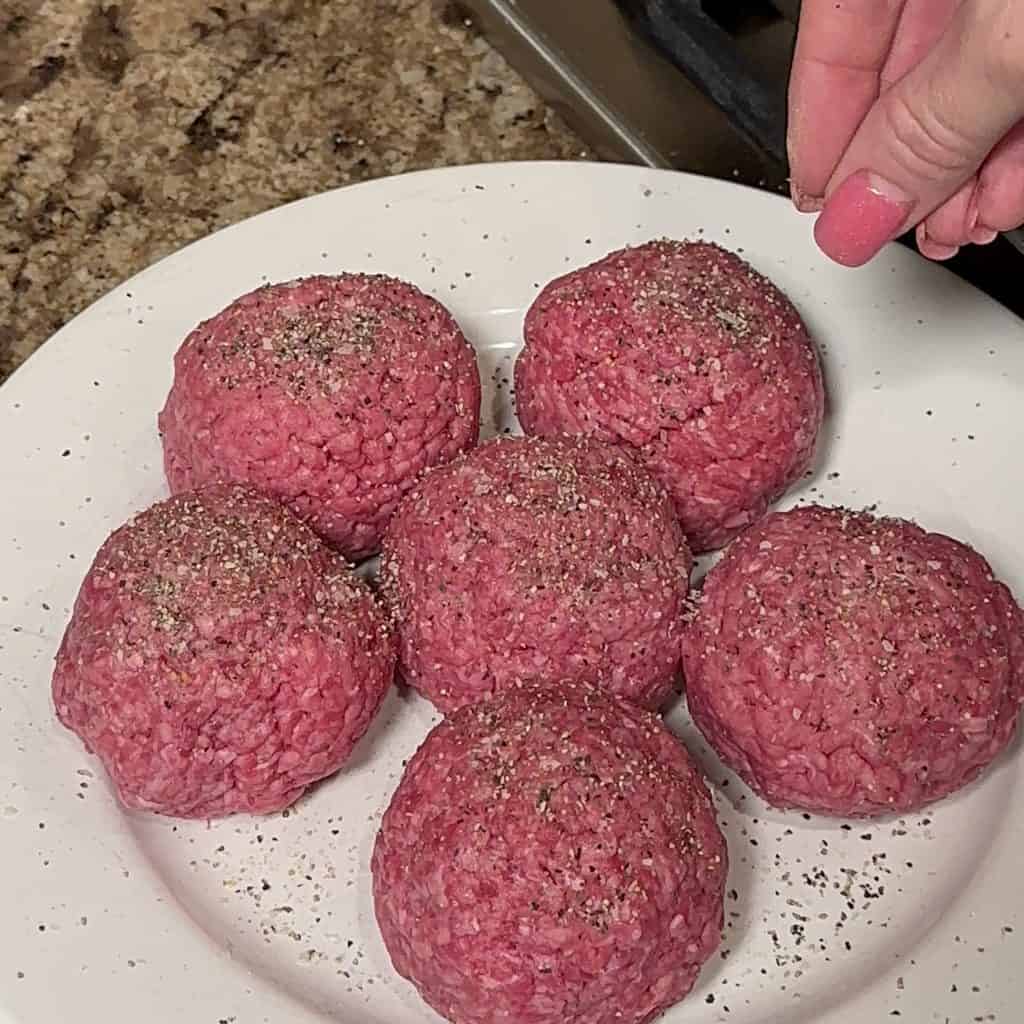
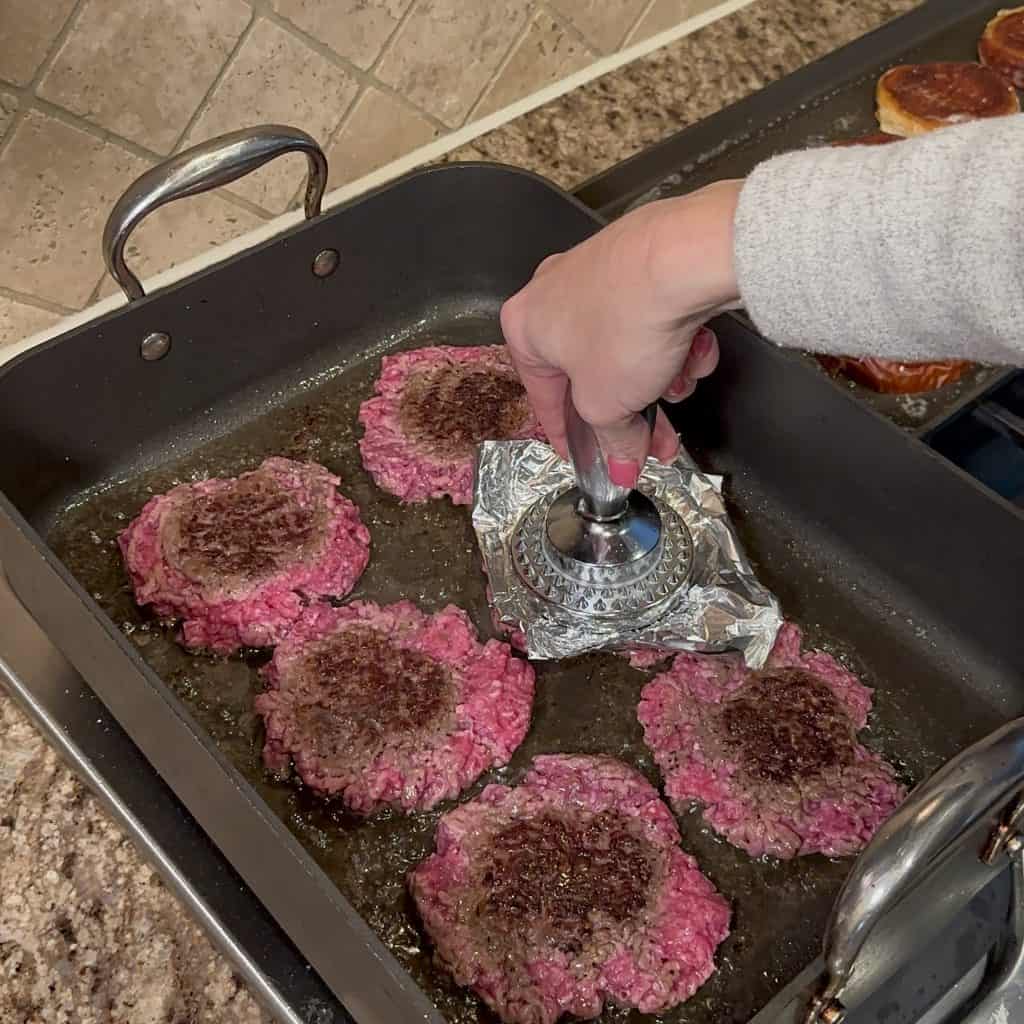
- On medium-high heat, lightly butter a grill pan or large skillet. Once the pan is hot, add the beef, seasoned side down. Season the top side with salt and pepper. Using a mallet or flat cooking tool, give each ball a slight push. Don’t flatten completely in this step. I use a piece of aluminum foil underneath my mallet so that it flattens the ball evenly and doesn’t stick.
- After 3-4 minutes, flip the burgers. Using the mallet or flat cooking tool, press and flatten the beef to a 1/2-inch thickness.
- Cook 3-4 minutes, flip again and cook to desired doneness. In the last minute of cooking, add cheese if making cheeseburgers. Optional step, butter and toast the buns. Transfer the patties to the buns and serve with your favorite toppings.
Tips and Substitutions
- To ensure desired doneness is achieved, check the internal temperature with a meat thermometer. Per the USDA, a safe internal temperature of hamburger is 160°F. For turkey or chicken, the safe internal temperature is 165°F.
- There will likely be controversy on pressing the patty, but to each their own! While not pressing can lock in moisture, these burgers give the sear and flavors of a good smash burger. If you don’t want to press your burger, go ahead and press them into a flatter patty before cooking.
- My first preference for a burger is ground beef 85/15. You can opt to use whatever level of fat ground beef you’d like or substitute with ground chicken or turkey. The fat adds moisture and tenderness, so the end result will change as you make substitutions. You can also mix in sauces for added moisture.
- You can’t get more basic than salt and pepper as seasoning, but I love that it doesn’t take away the flavor of the meat and the topping flavors are highlighted. You can absolutely add any seasoning you’d like. Occasionally, we’ll season with an all-purpose hamburger, beef or barbecue seasoning.
- The topping possibilities are nearly endless for a burger, but here’s a list to check out as you’re planning your next burger night:
- Lettuce
- Cheese
- Pickles
- Onions
- Ketchup
- Mustard
- Mayonnaise
- Jalapeños
- Roasted Peppers
- Caramelized Onions
- Sautéed Mushrooms
- The right cheese can make or break a burger. American cheese melts beautifully over a burger and has a mild flavor. Cheddar cheese yields a sharper, yummy flavor as well. Other cheese that work great are pepper jack, Colby jack, and Monterey Jack…all the Jacks!
- The perfect bun can make a big difference as well! Standard hamburger buns, they’re ok. However, a delicious pretzel or brioche bun can take a burger to the next level! Also, toasting them first is options, but boy is it delicious! For a low-carb alternative, you can substitute the buns with lettuce leaves.
- This Steakhouse Burger is an excellent elevated version. It has all of your favorite “fancy restaurant” flavors piled onto juicy beef patty under a toasted bun… think roasted mushrooms, creamy cheese and BACON!
Storage
- Once the burgers have cooled, any leftovers can be stored in an air-tight container in the refrigerator up to 3-4 days. Reheat as desired.
- Once cooled, the burgers can stored in the freezer in an air-tight container up to 3 months. I recommend storing the patties by themselves separate from buns so that you can use fresh buns when you’re ready to thaw and reheat.
- The potato wedges can be stored in an air-tight container in the refrigerator up to 3-4 days. They can be reheated in the oven, microwave or air fryer.
More Recipes Like This
- Easy Hamburger Steaks and Gravy
- Hamburger Steaks with Brown Gravy
- Cheesy Cajun Beef Mac and Cheese
- Mississippi French Dip Sandwiches
- Steak Sandwiches on the Griddle

Basic Burgers and Potato Wedges
Ingredients
Potato Wedges
- 3-4 russet potatoes cleaned and dried
- 3 tbsp olive oil
- 2-3 tsp seasoning salt or salt and pepper
Basic Burger
- 2-2 1/2 lb ground beef
- Salt and Pepper amount as desired
- 6 hamburger buns
- Toppings: cheese, lettuce, tomatoes, onion, pickles, mayonnaise, ketchup, mustard, etc.
Instructions
Potato Wedges
- Preheat the oven to 450°F.
- Cut the potatoes lengthwise into 3/4-inch wedges. On an aluminum foil-lined sheet pan, toss the potatoes with oil and seasoning salt. Spread in an even, flat layer. Roast in the oven for 20-25. Flip the potatoes and bake an additional 10-15 minutes or until slightly charred and golden brown.
- Transfer to a serving dish. Optional, sprinkle with additional seasoning salt.
Basic Burger
- Divide ground beef into even 6 ounce size balls or desired size. Season one side with salt and pepper.
- Swipe butter in a grill pan or large skillet on medium-high heat. Once the pan is hot, add the beef, seasoned side down. Using a mallet or flat cooking tool, give each ball a slight push. Don't flatten completely in this step. Season the top side with salt and pepper.
- After 3-4 minutes, flip the burgers. Using the mallet or flat cooking tool, press and flatten the beef to a 1/2-inch thickness. Cook 3-4 minutes, flip again and cook to desired doneness. In the last minute of cooking, add cheese if making cheeseburgers.
- If you'd like, butter and toast the buns. Transfer the cooked patties to the buns and serve toppings on the side.
Video
Nutrition

About Laura
Taught by some of the best, cooking and entertaining has always been my favorite hobby. Food is my love language! The conception of Dinner in 321 came from my family talks that sharing our dinners would help others learn new skills, tasty recipes, and make cooking fun! Read more…